Today, as I chopped and mashed, fried and stirred, and as I kneaded sticky dough and rolled it out thin I felt the calm satisfaction of cooking a myriad of components. The meditative pleasure of balancing elements and gradually working through a series of processes until it all comes together. I started early. I didn't want to rush through the cutting or filling stages and lose the joy of it all in a blur of stress and frazzled nerves.
There's a lot that goes into these seemingly innocent little dumplings. The dough has to be mixed and kneaded. The various elements of the filling must be cooked and then blended, carefully tasted and seasoned. The dough has to be rolled out, thin and a touch sticky, and cut into rounds. Then these must be filled with tiny spoonfuls of filling and then folded and sealed into little adorable parcels. Then they are cooked. Twice. First boiled to cook the raw dough and then fried, in a generous puddle of butter, until they're light brown, mouth-watering, and crispy.

This is comfort home-cooking at its finest. Food that should be cooked and consumed in the company of family or close friends. Food that makes you take your time.
I might possibly have bitten off a bit more than I could chew. I decided to attempt three different fillings. I had a sweet potato to use up and a few handfuls of spinach, so it seemed only logical to try something a little different this time. It went without saying that the traditional cheese and potato filling was still on the menu. If my experimental new fillings went disastrously wrong I still wanted my reliable go-to to fall back on! The other two fillings sort of came together in the kitchen, a pinch of this and a grating of that. That's generally my cooking style of choice, tasting and seasoning as I go, rather than strictly following a recipe or plan. That isn't exactly suited for writing down my recipe after the fact, however, so I tried to pay attention to what I was throwing in and wrote down some approximate amounts afterwards. This is one great thing I discovered about pierogis: they are a great spring-board for all sorts of flavor combinations. They can be as complicated or as simple as you want, filled with whatever takes your fancy, to suit your own tastes and cravings.

Recipe:
PierogiDough:
2 cups flour
1/2 teaspoon salt
1 egg (lightly beaten)
1/2 cup sour cream
1/4 cup butter, softened (57 grams)
Cheese and potato filling:
1 medium-sized potato, cooked and mashed
1 tablespoon butter
2 tablespoons sour cream
grated cheddar cheese to taste
pinch of white pepper
couple pinches of salt
about 2 tablespoons of finely chopped, sauteed onions
Sweet potato filling:
1 sweet potato
1 tablespoon butter
salt to taste
a pinch of cheddar cheese
1 tablespoon sour cream
Spinach and cheese filling:
a couple handfuls of spinach, cooked and drained of excess water
1/4 cup grated Parmesan
pinch of garlic powder
pinch of salt
pinch of white pepper
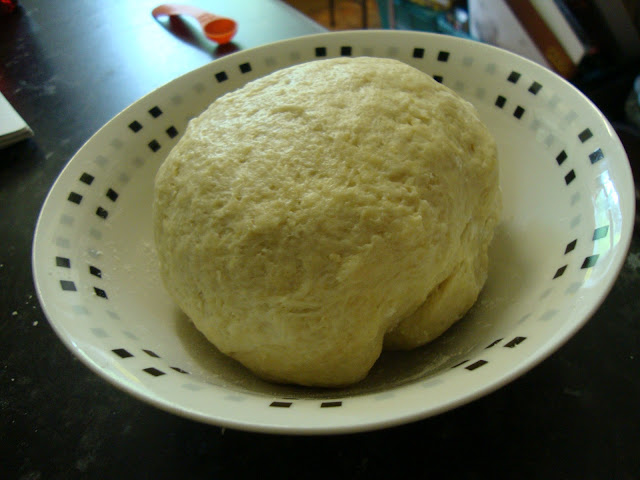
Sift together the flour and salt. Then, with a wooden spoon, stir in the beaten egg, sour cream, and finally the butter. Turn the dough out onto a lightly floured surface. It might still be pretty crumbly and not combined but once you start kneading it should come together pretty quickly. Knead the dough for a few minutes until its texture is uniformly elastic and a bit sticky. Cover and chill in the fridge for at least fifteen minutes (or you can make the dough in advance and chill over-night)
When you're ready to use to the dough, roll it out on a lightly flour surface (with a lightly floured rolling pin!) to to about a 1/8" thickness and use a round cookie cutter or class to cut out rounds. If you've chilled the dough for a longer amount of time, it will be fairly firm at this point, so let it rest out of the fridge for about ten minutes before you try to work with it. I found that I had a bit too much dough to roll it all out at once on my tiny kitchen counter, so I divided it into two balls and did them one at a time. I also found that, as I worked the dough, it got softer and warmed, making it a little harder to work with. Next time, I'll probably chill one half of the dough as I'm working with the other, to make sure it stays stiff.
For the first cooking stage, fill a medium-to-large sized pot with water and bring to a boil. Cook the pierogi a few at a time (don't overcrowd them but they don't need tons of space). They should take a few minutes to cook and they'll float to the surface when they're done. Dry them off (I let them rest on a clean dishtowel) before setting them aside.
The second stage of cooking should wait until shortly before you serve them, so that they're nice and hot and crispy. Melt a healthy (well, maybe the wrong choice of word...) nub of butter in a hot frying pan and fry the pierogi at a medium-high heat, a few minutes on each side, until they're lightly browned. Frying them with sauteed onions adds another tasty element (and the more onions the better, right?)


No comments:
Post a Comment